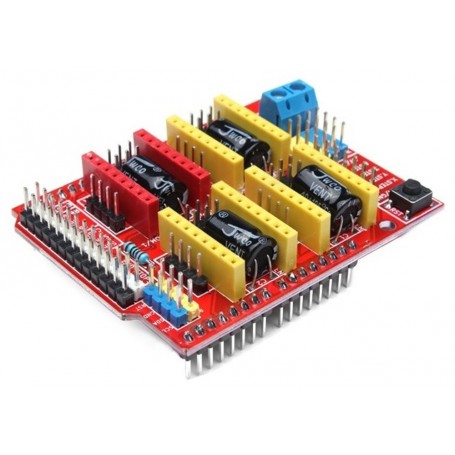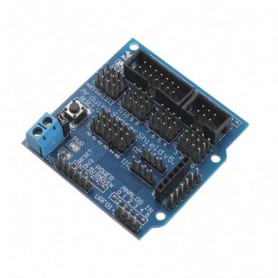
شیلد درایور CNC ورژن 3 از بردهای توسعه آردوینو بوده و به راحتی می توان روی برد آردوینو قرار داد. از شیلد درایور CNC می توان در ساخت دستگاه لیزر و برش CNC، پرینتر سه بعدی، ربات های صنعتی استفاده کرد. برای راه انداری شیلد درایور CNC از ماژول های (A4988، DRV8825) و استپرموتورهای دوقطبی یا همان چهار سیمه استفاده کرد.
مشخصات
- ولتاژ کاری: 12 تا 36 ولت
- ماژول های استپ درایو سازگار: A4988, DRV8825
- پشتیبانی از 4 محور
محتویات
یک عدد شیلد درایور CNC بدون جامپر و درایور
Specification
Latest Arduino CNC Shield V3
GRBL 0.8c compatible. (Open source firmware that runs on an Arduino UNO that turns G-code commands into stepper signals)
4-Axis support (X, Y, Z , A-Can duplicate X,Y,Z or do a full 4th axis with custom firmware using pins D12 and D13)
2 x End stops for each axis (6 in total)
Spindle enable and direction
Coolant enable
Uses removable Pololu A4988 compatible stepper drivers. (A4988, DRV8825 and others)
Jumpers to set the Micro-Stepping for the stepper drivers. (Some drivers like the DRV8825 can do up to 1/32 micro-stepping )
Compact design.
Stepper Motors can be connected with 4 pin molex connectors or soldered in place.
Runs on 12-36V DC. (At the moment only the Pololu DRV8825 drivers can handle up to 36V so please consider the operation voltage when powering the board.)
Please note that this is an unassembled kit and needs soldering.
Instruction
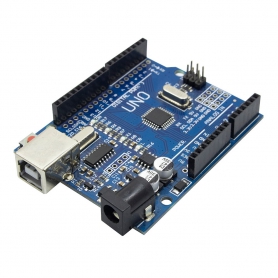
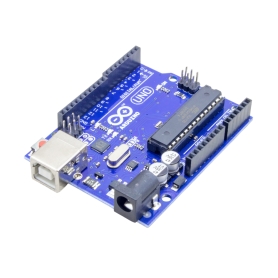
UNO for Arduino---------------------- expansion board
8 ------------------------ EN ( stepper motor driver enable , active low )
7 ----------------------- Z.DIR (Z -axis direction control )
6 ----------------------- Y.DIR (Y -axis direction control )
5 ----------------------- X.DIR (X -axis direction control )
4 ---------------------- Z.STEP (Z -axis stepper control )
3 ---------------------- Y.STEP (Y -axis stepper control )
2 ---------------------- X.STEP (X -axis stepper control )
/ / The following is a simple stepper motor control procedures,
# define EN 8 / / stepper motor enable , active low
# define X_DIR 5 / / X -axis stepper motor direction control
# define Y_DIR 6 / / y -axis stepper motor direction control
# define Z_DIR 7 / / z axis stepper motor direction control
# define X_STP 2 / / x -axis stepper control
# define Y_STP 3 / / y -axis stepper control
# define Z_STP 4 / / z -axis stepper control
/ *
/ / Function : step . function: to control the direction of the stepper motor , the number of steps .
/ / Parameters : dir direction control , dirPin corresponding stepper motor DIR pin , stepperPin corresponding stepper motor " step " pin , Step number of step of no return value.
* /
void step (boolean dir, byte dirPin, byte stepperPin, int steps)
{
digitalWrite (dirPin, dir);
delay (50);
for (int i = 0; i <steps; i + +) {
digitalWrite (stepperPin, HIGH);
delayMicroseconds (800);
digitalWrite (stepperPin, LOW);
delayMicroseconds (800);
}
}
void setup () {/ / The stepper motor used in the IO pin is set to output
pinMode (X_DIR, OUTPUT); pinMode (X_STP, OUTPUT);
pinMode (Y_DIR, OUTPUT); pinMode (Y_STP, OUTPUT);
pinMode (Z_DIR, OUTPUT); pinMode (Z_STP, OUTPUT);
pinMode (EN, OUTPUT);
digitalWrite (EN, LOW);
}
void loop () {
step (false, X_DIR, X_STP, 200); / / X axis motor reverse 1 ring, the 200 step is a circle.
step (false, Y_DIR, Y_STP, 200); / / y axis motor reverse 1 ring, the 200 step is a circle.
step (false, Z_DIR, Z_STP, 200); / / z axis motor reverse 1 ring, the 200 step is a circle.
delay (1000);
step (true, X_DIR, X_STP, 200); / / X axis motor forward 1 laps, the 200 step is a circle.
step (true, Y_DIR, Y_STP, 200); / / y axis motor forward 1 laps, the 200 step is a circle.
step (true, Z_DIR, Z_STP, 200); / / z axis motor forward 1 laps, the 200 step is a circle.
delay (1000);
}
Note: When inserting the A4988 module, must be careful not to insert opposite. Stepper motor wiring as follows:
2A, 2B is a group (red, green), 1A, 1B is a group (blue, yellow), if want to change direction, can be change the position of one group , for example 2A, 2B mutually exchanged.
-
محبوب اخدر | 5 ماه پیش آیا این شیلد نیاز به جامپر خاصی دارد ؟
-
پشتیبانی | 5 ماه پیش سلام بله شیلد CNC ورژن 3 برای تنظیمات صحیح نیاز به قرار دادن جامپرها دارد. سه جامپر در زیر هر درایور A4988 یا DRV8825 قرار میگیرد که تعیینکننده مد میکرواستپینگ هستند و بسته به ترکیب آنها میتوانید حالتهای Full Step، Half Step، 1/4، 1/8 یا 1/16 استپ را انتخاب کنید. همچنین جامپرهایی برای فعالکردن محور Z دوگانه یا انتخاب Endstop ها وجود دارد. بدون تنظیم صحیح جامپرها، درایورها یا در حالت پیشفرض کار میکنند یا عملکرد دلخواه حاصل نخواهد شد. برای دریافت پاسخ سریع و جامع در مورد سوالات علمی و فنی خواهشمند است به انجمن های تخصصی برق و الکترونیک ECA مراجعه فرمایید. (https://forum.eca.ir)
-
-
سمکو محمدپور | 1 سال پیش سلام شیلد cnc ورژن 3 پراپ رو ساپورت نمیکنه گفتم که یکم شفاف سازی بشه اگر برای تولید pcb میخواین cnc بسازین حتما به پراپ نیاز خواهید داشت -
محمد حبیبی | 1 سال پیش از کدوم کانکتور برای اتصال سیم موتور براشلس به شیلد استفاده کنم؟
-
پشتیبانی | 1 سال پیش سلام به نسبت کانکتور سیم خود می بایست انتخاب کنید مادگی های موجود بر روی این ماژول استاندارد خاصی ندارد و صرفا پین هدر مادگی هستند .
-
-
آیناز زارع | 3 سال پیش چند امپر؟-
پشتیبانی | 3 سال پیش سلام ، اطلاعاتی از سوی سازنده ارائه نشده
-
-
بهادر احدی | 3 سال پیش یک سوال دیگه داشتم اینکه آیا میشه درایور a4988 رو بدون این شیلد به کنترلر mach3 کانکت کنم؟؟-
پشتیبانی | 3 سال پیش سلام ، در این مورد اطلاعاتی در دسترس نمی باشد .
-
-
بهادر احدی | 3 سال پیش با سلام
امکان استفاده از این برد با بورد اردوینو uno هست؟-
پشتیبانی | 3 سال پیش سلام ، بلی می توانیدبا آردوینو uno نیز راه اندازی نمایید.
-
-
عماد صادقی | 3 سال پیش با سلام امکان اتصال لیزر ۴۰ وات به شلید و استفاده مناسب هست-
پشتیبانی | 3 سال پیش سلام ، این مورد تست نشده است .
-
-
رضا غنی زاده | 3 سال پیش سلام.از ماژول درایورLV8729 می توان برای افزایش دقت استفاده کرد؟-
پشتیبانی | 3 سال پیش سلام ، در این مورد تست نشده است .
-
-
Hajali بایرامزاده | 4 سال پیش سلام .ماژول کنترلر پرینتر سه بعدی Reprapdiscount با نمایشگر گرافیکی 128x64 رو میشه به این برد وصل کرد؟-
پشتیبانی | 4 سال پیش سلام، خیر امکان پذیر نیست.
-
-
فرهاد نوبخت | 4 سال پیش سلام استاد این جامپر ها که هست تو چه مواردی لازمه که جا بجا بشن .ممنون میشم توضیح بدیدمختصر.-
پشتیبانی | 4 سال پیش سلام، برای دریافت پاسخ سریع و جامع در مورد سوالات علمی و فنی خواهشمند است به انجمن های تخصصی برق و الکترونیک ECA مراجعه فرمایید. (www.eca.ir/forums)
-
- 1
- 2
- ...
- 6
- بعدی
