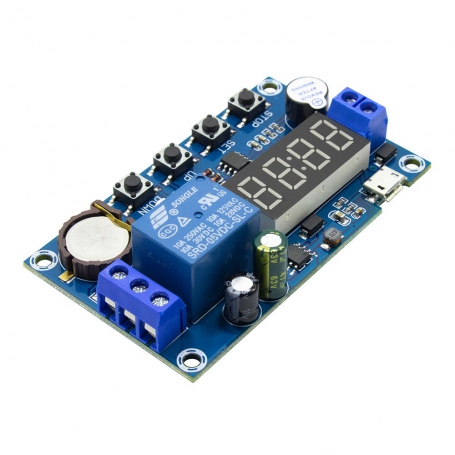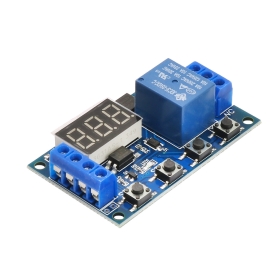
ماژول تایمر و ساعت مدل XY-BJ یک تایمر برای زمان بندی قطع و وصل خروجی رله، هماهنگ سازی ساعت، کنترل زمان و همچنین تاخیر 24 ساعته دارای 5 دوره زمانی میباشد.
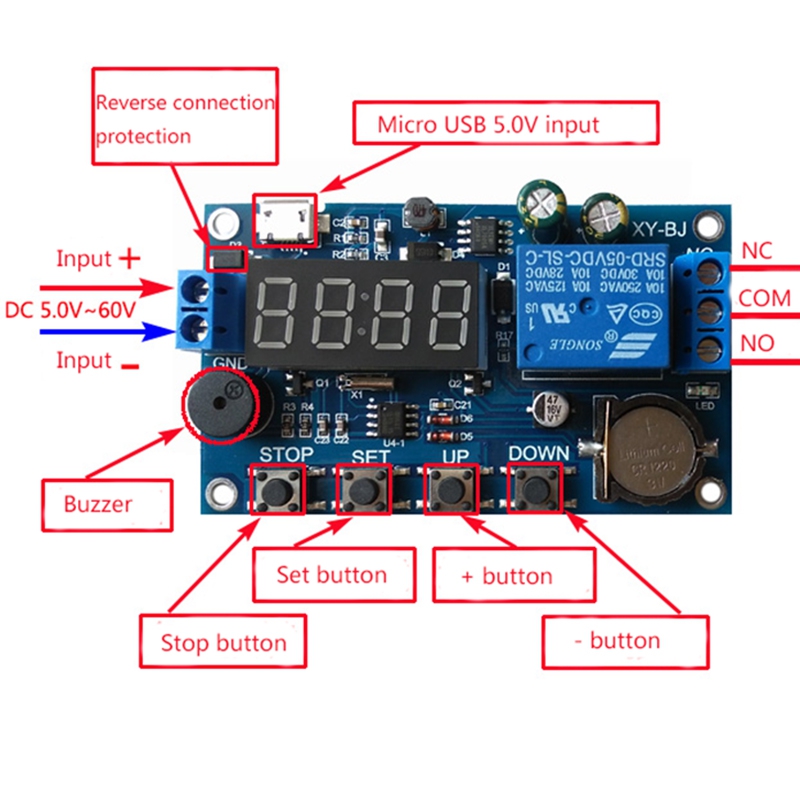
ولتاژ ورودی ماژول بین 5 تا 60 ولت DC میباشد. همچنین در قسمت ورودی ماژول یک سوکت Micro USB قرار دارد که این امکان را فراهم میسازد تا بتوان با استفاده از شارژر های 5 ولت (موبایل های اندروید) نیز ماژول را راهاندازی نمود. در قسمت خروجی ماژول یک رله 10 آمپری موجود است که طبق زمان بندی های انجام شده خروجی را قطع و وصل میکند.
نحوه راه اندازی
پس از اتصال تغذیه به ماژول، نمایشگر پارامترهای ساعت و دقیقه را نمایش میدهد با فشردن و نگه داشتن کلید DOWN به مدت 2 ثانیه نمایشگر به مدت چند ثانیه عبارت “YEA” را نمایش میدهد و پس از آن استفده از کلید های UP و DOWN میتوانید پارامتر سال را تنظیم نمایید. سپس با فشردن کلید SET نمایشگر به مدت چند ثانیه عبارت “dAE” را نمایش میدهد. در این قسمت با استفاده از کلید های UP و DOWN میتوانید ابتدا پارامتر ماه و پس از فشردن کلید SET میتوانید پارامتر روز را تنظیم نمایید. با فشردن دوباره کلید SET نمایشگر به مدت چند ثانیه عبارت “HOU” را نمایش میدهد. این بار هم مانند قبل میتوانید با استفاده از کلید های UP و DOWN پارامتر ابتدا پارامتر دقیقه و و پس از فشردن کلید SET پارامتر ساعت را تنظیم نمایید. با فشردن دوباره کلید SET ماژول به صفحه اصلی باز میگردد و پارامتر تنظیم شده ی ساعت و دقیقه را نمایش میدهد.
با فشردن و نگه داشتن کلید SET به مدت 2 ثانیه ماژول وارد بخش تنظیم دورهها میشود. در بخش تنظیم دورهها بایستی ابتدا با استفاده از کلید های UP و DOWN یکی از دورههای PE-1 تا PE-5 را انتخاب نموده و سپس کلید SET را فشار دهید. سپس یکی ازMode های P-1 تا P5 را با استفاده از کلید های UP و DOWN انتخاب کنید (“----“ نشانگر این است که این حالت از قبل تنظیم شده است) پس از انتخاب حالت با فشردن کلید SET نمایشگر به مدت چند ثانیه عبارت “OPE” را نمایش میدهد که به معنای زمان شروع میباشد را میتوانید پس از آن با استفاده از کلید های UP و DOWN تنظیم نمایید. با فشردن کلید SET اینبار نمایشگر عبارت “CLE” را به مدت چند ثانیه نمایش میدهد که به معنای زمان اتمام دوره می باشد. با فشردن دوباره کلید SET نمایشگر عبارت “dAE” را نمایش میدهد. این پارامتر برای تنظیم تاریخ میباشد. سپس ماژول به صفحه اصلی بازمیگردد.
Introduction
Wide voltage power supply 5.0V ~ 60V;
A mode can be set for multiple time periods, can reach 5 time periods;
With a buzzer alarm function.
Mode introduction:
OPE: relay closing time point, CLE: relay off time point
Time period: PE-1 ~ PE-5 5 time periods (OPE to CLE is a time period)
----: function shielding
P-1: The relay closes or outputs pulses every day to the OPE time point, and the relay turns off or outputs pulses to the CLE time point.
P-2: set the day, to the OPE time point when the relay closed or output pulse, to the CLE time point when the relay disconnect / or output pulse
P-3: set the date of the month, to the OPE time point when the relay closed or output pulse, to the CLE time point when the relay is off or output pulse
P-4: Set the date 1 to date 2, start every day at the OPE time point, end to the CLE time point, relay action or output pulse
P-5: As with P-4, only the month can not be set
how to set the time?
In the time to run the interface, press the DOWN button for a while:
Step 1: Select the time period: PE-1 ~ PE-5 Press UP and DOWN to select;
Step 2: Press the SET key to select the mode: P-1 ~ P-5 (Set this time period to the corresponding mode) by pressing the UP and DOWN keys. ("----" means to block this time period)
Note: Each time period can be repeated from the "----", P-1 ~ P-5 one of the optional; For example,you can let five time periods at the same time work in the P-1 mode, or let Time period 1 work in P-1 mode, time period 2 work in P-2 mode and so on.
Step 3: After the mode selection is finished, press the SET key to enter the time period setting interface, set the interface in the time period, press the SET key to switch the parameter, "OPE" start time point, "CLE" end point, "dAE" date information;
Step 4: After setting the parameters to exit the settings, press the SET button for 2 seconds to release, automatically check whether the parameter settings are legal, legal to save the parameters, return to the time to run the interface; if the parameter is wrong, "ERR" reminder (for example, stop time or Date <= start time or date), return to the parameter setting interface;
Additional features: Each "time period" can be set individually
In the specific parameter setting interface (after the second step), press the STOP button to switch the output mode:
OUT1: Start time point turns on the relay, the end time is off the relay
OUT2: Outputs 1S pulse to start or end time
In the specific parameter setting interface (after the second step), press the STOP button for a while to switch the ringing mode:
BLL0: Ring disable
BLL1: Ring enable
Note: When the bell rings, press any button to stop the ring
STOP key function expansion:
Relay enable mode:
1. ON: enable relay on;
2. OFF: Do not turn on the relay, it is always off;
Press the STOP button on the time display interface to switch between ON and OFF, the current status will flash, and then return to the main interface. (This function is the emergency stop function, press once to close the closed relay)
After the relay is disabled, the product can be used as an alarm clock.
Sleep mode:
1. C-P sleep mode: within five minutes, without any operation, the digital tube automatically shut down the display, the program normal operation;
2. O-d normal mode: digital tube is always open display;
Press the STOP button for a while after 2 seconds to release, to achieve C-P and O-d state of the switch, the current state will flash, and then return to the main interface

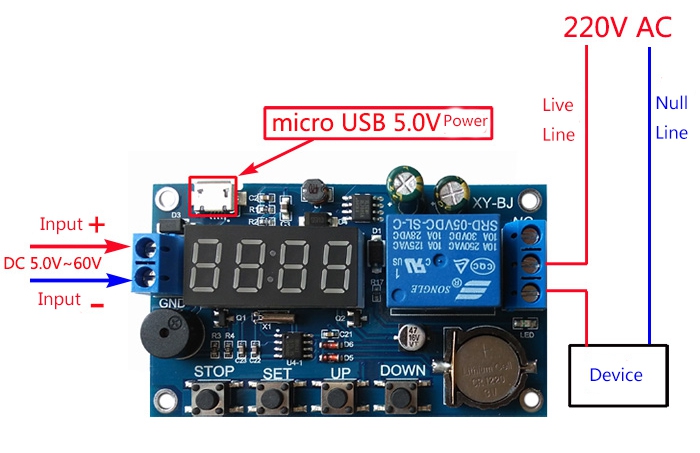
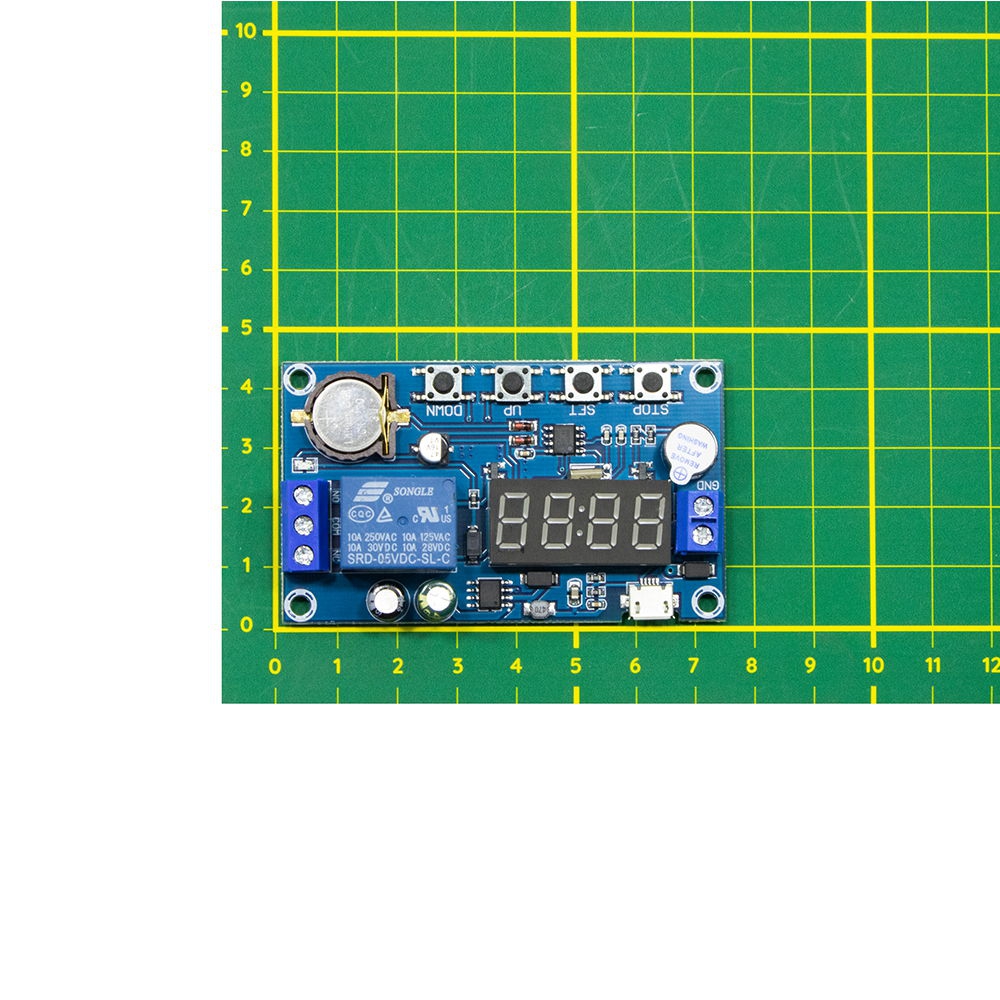
-
رادین (ع) | 1 ماه پیش درود ورودی ۱۲ ولت برای روشن شدن اوکیه؟ و اینکه خروجیش به چه صورت هست ۲۲۰ ولت وصل کنیم جوابه؟ و لطف کنید بگید فیش هاش چه جور هستن چون خروجیش ۳ تا فیش داره
-
پشتیبانی | 1 ماه پیش سلام این ماژول در بازه 6 تا 30 ولت DC تغذیه میشود، بنابراین ورودی 12 ولت کاملاً مناسب است. خروجی آن رله مکانیکی تککنتاکت است که سه پایه دارد: COM (مشترک)، NO (در حالت عادی باز) و NC (در حالت عادی بسته). رله فقط عمل قطع و وصل را انجام میدهد و خود ولتاژ تولید نمیکند، بنابراین میتوان بار 220 ولت AC را از طریق آن کنترل کرد بهشرط رعایت جریان مجاز رله (معمولاً تا 10 آمپر برای 220 ولت). برای تغذیه خود ماژول حتماً از ولتاژ DC استفاده شود نه از 220 ولت مستقیم.
-
-
علی رستمی | 2 ماه پیش سلام آیا این تایمر برنامه تنظیم شده رو برای روشن و خاموش کردن ،به صورت متوالی هر روز اجرا میکنه ،یا اینکه دوره ای هست مثلاً هفتگی یا ماهانه ؟
مشاهده پاسخ ها (3)-
پشتیبانی | 2 ماه پیش سلام و احترام،
ماژول تایمر XY-BJ از نوع تایمر چرخهای و تکرارشونده است و برنامه تنظیمشده را بهصورت متوالی و پیوسته اجرا میکند، یعنی پس از پایان هر سیکل روشن و خاموش، مجدداً همان برنامه تکرار میشود. این ماژول فاقد تقویم داخلی است، بنابراین قابلیت زمانبندی هفتگی یا ماهانه ندارد و فقط بر پایه فاصله زمانی تنظیمشده (ثانیه، دقیقه یا ساعت) عمل میکند.
-
-
محمدرضا محمدی | 4 ماه پیش اینو چند روز پیش نصب کردم دو روز هم برنامه چک کردم طبق برنامه پیش رفت ولی یک هفته بعد رفتم سراغش دیدم آبیاری باغ به هم ریخته چک کردم دیدم تایم ساعت به هم خورده در حالیکه برق قطع نشده و مستقیم از باطری نیروگاه خورشیدی تغذیه میشه کسی میدونه علتش چی هست؟ تو یک هفته حدود۲۰ ساعتی تایم جابجا شده بود
مشاهده پاسخ ها (3)-
پشتیبانی | 4 ماه پیش برای دریافت پاسخ سریع و جامع در مورد سوالات علمی و فنی خواهشمند است به انجمن های تخصصی برق و الکترونیک ECA مراجعه فرمایید. (https://forum.eca.ir)
-
-
حمید محمدی | 4 ماه پیش دو تا سوال دارم اول اینکه ثانیه رو هم ساپرت میکنه ؟ مثلا در ساعت خاصی ۴ ثانیه روشن شه و خلموش شه ؟ اگه نمیکنه کدوم ماژول ساپورت میکنه ؟ دوم اینکه توی شماتیک قسمت خروجی زدین 220ac . من میخوام توی خروجی یه موتور dc ربات رو کنترل کنه . امکان پذیره؟
-
پشتیبانی | 4 ماه پیش سلام ماژول XY-BJ فقط زمان با دقت دقیقه را پشتیبانی میکند، نه ثانیه؛ برای زمانبندی ثانیهای میتوانید از مدل XY-LJ02 استفاده کنید. خروجی رله آن برای موتور DC با ولتاژ و جریان مناسب قابل استفاده است.
-
-
فرزاد عمانی | 7 ماه پیش مشخصات باتریش چی هست؟
-
پشتیبانی | 7 ماه پیش سلام باتری از نوع سکه ای و مدل CR1220 می باشد .
-
-
رضا جاوید | 9 ماه پیش سلام خسته نباشید این ماژول دارای حافظه هست؟ اگه برق تنظیماتش بهم نمیخوره؟
-
پشتیبانی | 9 ماه پیش سلام خیر برنامه ذخیره شده با قطع و وصل برق از بین نمی رود.
-
-
سینا پوراصغر | 12 ماه پیش عالییییییی -
محسن قاسم پور | 1 سال پیش سلام ، تاریخ ماژول شمسی یا میلادی ؟
-
پشتیبانی | 1 سال پیش سلان در حالت کلی تنظیم توسط کاربر بوده و بسته به نوع نیاز است .
-
-
محمد امین مرادی لقب | 2 سال پیش سلام، میخوام به عنوان ساعت رومیزی ازش استفاده کنم، آیا این ماژول قابلیت استفاده به عنوان ساعت رو داره که ۲۴ ساعته باشه بدون قطع و وصل و استفاده ممتد؟ قابلیت آلارم در زمان تنظیم شده داره؟
-
پشتیبانی | 2 سال پیش سلام برای ساخت ساعت رومیزی کاربردی ندارد در صورت تنظیم و ست کردن می توانید آلارم و یا هر وسیله دیگری را فعلا نمایید .
-
-
وحید بصیرزاده | 2 سال پیش با عرض سلام. راستش اکثر تایمرهای موجود بازار با برق شهر تغذیه میشوند و مزیتی که این ماژول تایمر برای من داره اینه که با ولتاژ DC تغذیه میشه اما در نهایت به دلیل باگهایی که عرض میکنم متاسفانه برای من قابل استفاده نیست. این ماژول ساعت دقیق و قابل اطمینانی داره و باطری بک آپی وجود داره که با قطع برق ساعت و برنامه های داده شده را حفظ میکنه اما متاسفانه با قطع و وصل شدن مجدد برق تایمر، حتما یکی از کلیدها باید دستی زده بشه تا برنامه دوباره شروع به کار کنه.از اون بدتر اکثر اوقات که برق به ماژول وصل میشه کلیدهای تنظیم برای حدود ۳ دقیقه هنگ هستند. مشکل دیگری که وجود داره با وصل برق به ماژول گاهی بازر دستگاه شروع به آلارم میکنه و باید کلیدی زده بشه که غیر فعال بشه و این در حالیست که من روی تنها برنامه ای که به تایمر داده ام بازر را غیر فعال کرده ام.من سه عدد از این ماژول را تست کردم و هر سه این باگها را داشتند.
مشاهده پاسخ ها (3)
- 1
- 2
- بعدی
