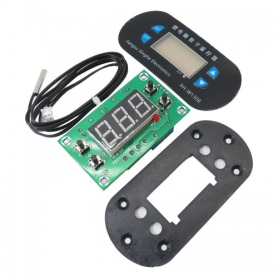
نحوه استفاده
با زدن دکمه SET به صورت لحظه ای دمای تحریک را تعیین نمایید.
با فشار دادن SET به مدت 5 ثانیه وارد تنظیمات می شوید. با انتخاب از بین P0 تا P7 با کلیدهای ADD و DEC و زدن کلید SET وارد تنظیمات مربوطه شده و پارامتر مورد نظر را تعیین کنید.
P0 مد کاری: با انتخاب از بین دو گزینه C و H مد کاری ترموستات را تعیین کنید.
برای کنترل هیتر، گزینه H و برای کنترل سیستم های خنک کننده، گزینه C را انتخاب نمایید.
P1 تنظیمات هیسترزیس: برای تعیین تلورانس حساسیت به کار می رود. تغییرات وضعیت رله با حساسیت تعیین شده برای سیستم مرتبط است و بعد از تغییر وضعیت رله تغییرات جزئی دما موجب تغییر وضعیت رله نمی شود تا زمانی که حساسیت تعیین شده رفع شود. به طور مثال دمای تعیین شده 30 درجه است بعد از گذشتن از این دما سیستم رله را قطع می کند در صورتی که حساسیت سیستم روی 2 درجه تنظیم شده باشد تا 28 درجه رله تغییر وضعیت نمی دهد.
P2 حداکثر دما
P3 حداقل دما
P4 کالیبراسیون: برای کالیبره کردن مورد استفاده قرار می گیرد، به این صورت که با توجه به اختلاف دمای اندازه گیری شده با دمای واقعی یک Offset برای سیستم تعریف می شود. که در صورت نداشتن دماسنج دقیق برای مقایسه مقدار پیش فرض صفر مطلوب می باشد.
P5 تاخیر تغییر وضعیت: زمان تاخیر برای تغییر وضعیت رله بعد از گذشتن از حد مجاز دما(قابل تنظیم از 0 تا 10 دقیقه با دقت 1 دقیقه).
P6 آلارم دمای غیر مجاز: دمایی که در صورت تجاوز از آن آلارم بازر فعال می شود.
P7 قفل تنظیمات: با فعال شدن این گزینه تنظیمات قابل تغییر نیستند تا زمانی که این گزینه غیر فعال گردد.
با زدن ADD و DEC به صورت هم زمان به مدت 5 ثاینه ماژول به تنظیمات کارخانه بازیابی می شود.
در صورتی که نمایشگر پیغام LLL را نشان دهد به معنای عدم دریافت داده از سنسور می باشد.
در صورتی که نمایشگر پیغام HHH را نمایش دهد یعنی دمای مورد نظر از محدوده دمای تعیین شده تجاوز کرده است.
 Specification
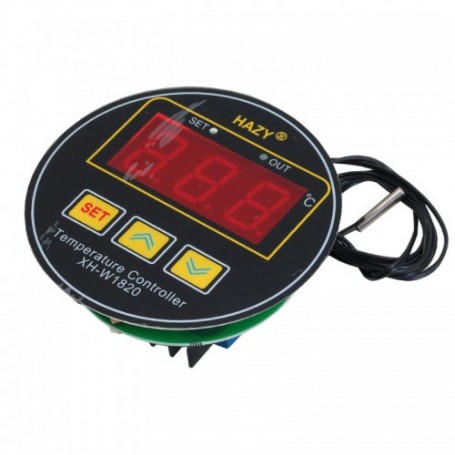
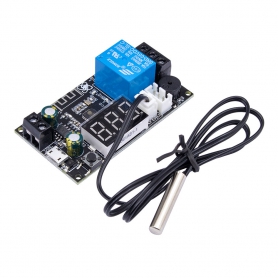
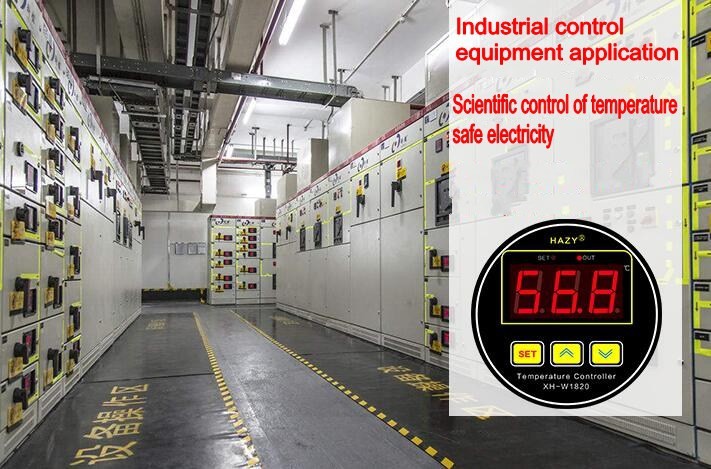
Product Name: XH-W1820
Output Type: Delay Switch
Temperature range: -50~110Celsius
Temperature control range: -50~110Celsius
Temperature measurement accuracy: 0.3Celsius
Temperature control accuracy: 0.1Celsius
Resolution: 0.1Celsius
Input measurement: NTC10K waterproof probe L = 1 meter waterproof
Work order voltage: DC 12V-24A
Support load:30A(Max)
Applicable environment: -25~55° humidity 20%-85%
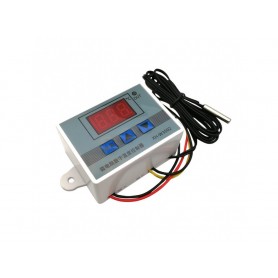
Module Size:68*40*23mm
Product weight: about 135g
Appearance size: diameter 100mm
Opening size: diameter 81mm/2mm
Please don't overload.
Display LLL means the module is not connected to the sensor.
Display HHH means the wire of the sensor is a short circuit or real-time temperature out of setting temperature range.
Keep press button UP and DOWN more than 5 seconds at the same time to restore factory settings.
Instruction
1. Connect the power supply and load according to the instructions. Please do not overpressure and overload.
2. Setting mode, long press SET button for 5 seconds will display P0. Press the SET button shortly to set H to heating mode and C to cooling mode (up and down button to switch)
3. Set the stop temperature, press the SET button once to flash the screen, and then press the up and down keys to set the desired stop temperature.
4. Press and hold the SET button for 5 seconds to display P0, press the up and down keys to switch to P1, then press the SET button to set the difference back (press the up and down keys to adjust). If the heating mode H needs to control the temperature between 36-38 degrees, then the stop temperature is set to 38 degrees and the back difference is set to 2 (the highest temperature minus the lowest temperature)
5. Indicator light. SET light is on to indicate that the parameter is being set; the OUT indicator is flashing to indicate the start delay, and always on to indicate the output.
Press the SET button for 5 seconds to enter internal parameter setting, up and down button to switch P0-P7
Code description Setting Factory setting
P0 Operating mode C/H H
P1 Backlash setting 0.1-30 2
P2 Set an upper limit, Max. 110 ° C 110°C
P3 Set lower limit Min. -50 ° C -50°C
P4 Temperature correction -10~10°C 0°C
P5 Delayed start 0-10 minutes 0
P6 High-temperature alarm -50~110°C 110°C
P7 Data lock (OFF/ON) OFF
P0: Heating and cooling mode H/C
The low-temperature start is the heating mode, set to H., For example, the actual temperature is 21 ° C, the temperature needs to be controlled between 36-38 ° C, we set P0 to H heating mode.
The high-temperature start is the cooling mode, set to C., For example, the actual temperature is 38 °C, and the temperature needs to be controlled between 24-26 °C. We set P0 to C cooling mode.
P1: Hysteresis setting
In heating mode (H): The measured value starts the output heating to the set value when the set value - hysteresis.
For example, to control an indoor temperature between 36 and 38 ° C, the actual temperature is 20 ° C, heating equipment is required to heat room, P0 is set to H, the stop temperature is set to 38 degrees, and P1 is set to 2. (High temperature - low temperature = hysteresis, 38-36 = 2)
In cooling mode (C): When the measured value >= set value + hysteresis, the output cooling is started until the set value stops.
For example, to control an indoor temperature between 24 and 26 ° C, the actual temperature is 36 ° C, the cooling equipment is required to cool room, P0 is set to C, the stop temperature is set to 24 degrees, and P1 is set to 2. (High temperature - low temperature = hysteresis, 26-24 = 2)
P2: Limit the maximum set value (non-temperature control setting): up to 110 °C
For example, if P2 is set to 50 °C, then when you set the operation, the maximum temperature can only be set to 50 °C.
P3: Limit the min. set value (non-temperature control setting): min. -50 °C
For example, if P2 is set to 20 °C, then when you set the operation, the set min. temperature can only be 20 °C. Since P2 is set to 50 degrees and P3 is set to 20 degrees, then your set is only Can be adjusted between 20~50 degrees.
P4: Temperature correction
When the measured temperature deviates from the standard temperature, this function can be used to correct the corrected temperature = temperature before correction + correction value
For example, the probe measurement temperature is 22.8 ° C, the standard temperature is 24.2 ° C, you need to increase the height by 1.4 degrees, set P4 = 1.4
For example, the probe measurement temperature is 26.31 ° C, the standard temperature is 23.5 ° C, it needs to be lowered by 2.8 degrees, and P4 = -2.8 can be set.
P5: Delay start time: 0~10 minutes
When controlling the cooling of the compressor equipment, the delay time can be set as required. When the controller outputs, the equipment will not start immediately, and it needs to be started after the set delay time has elapsed. (Non-compressor control is set to 0)
P6: High-temperature alarm
When the measured value is greater than the alarm value, the screen temperature flashes, and the drip sound alarm, the output is forcibly turned off in the heating mode, and the output is not turned off in the cooling mode.
P7: Data lock function
Turn on the data lock, P7 is turned ON to save the current setting parameters without being changed. At this time, the setting temperature and function are invalid. If you need to modify, you need to enter P7 to turn OFF the data lock function.

-
سجاد آقاسی زاده | 3 سال پیش سلام
آیا این محصول رو موجود میکنید؟
بر اساس همین دستگاه رو طراحی کردیم - حالا ناموجود شده
ممنون میشم سریعتر موجود بشه -
امیرحسین ريیسی پارسايی | 6 سال پیش سلام،خسته نباشید...
این ترموستات با منبع چند ولت چند آمپر به صورت ایده آل کار میکنه؟!
چون توی عکس 12V-24V گفته شده اما توی توضیحات اینگلیسی محصول 12V-24A اومده!!!-
پشتیبانی | 6 سال پیش سلام، این ماژول با هر تغذیه 12 تا 24 ولت DC با جریان 1A به بالا به صورت کاملا صحیح کار می کند(برای کاهش تلفات استفاده از ولتاژ 12 ولت توصیه می شود).
-
