معرفی
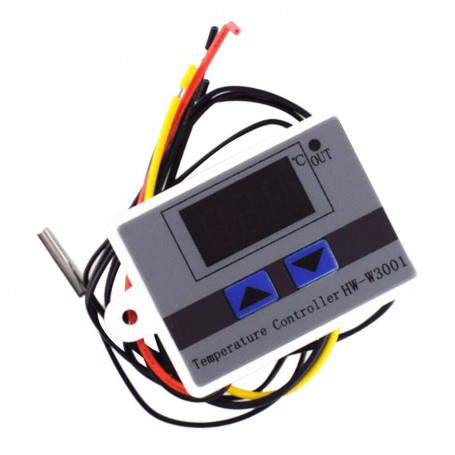
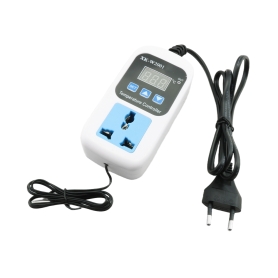
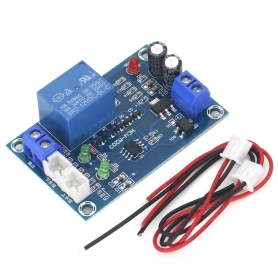
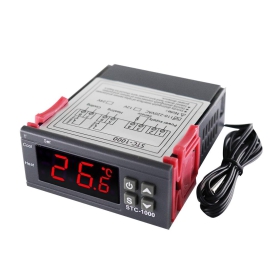
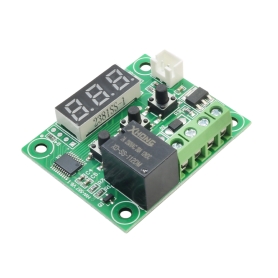
ماژول HW-W3001 ترموستات دیجیتال با رله بطور کلی ترموستات برای تنظیم درجه حرارت مایعات، گازها و جامدات در دستگاههای گرم یا سردساز در بخشهای مختلف مورد استفاده قرار می گیرد.
مشخصات
- دارای سنسور بیرونی ضدآب
- رنج دمایی : 50- الی 110 درجه سانتی گراد
- دقت: ± 0.1 درجه سانتی گراد
- ولتاژ کاری : 12VDC
- طول سیم : 50 سانتی متر
Specification
Product model:(XH)HW-W3001 / HW-735
Material: Electrical components
Temperature measurement range: -50℃-110℃
Temperature control range: -50℃-110℃
Accuracy of temperature measurement: +-0.2℃
Temperature Control Accuracy: +-0.1℃
Input measurement: NTC 10KL = 1m waterproof probe
Input power supply: 12V
Output power: 120W
Output type: direct output
Output capacity: maximum 10A
Appearance size: 60mm*45mm*31mm/2.36*1.77*1.22''
Packing weight: 51g
Applications
1. Setting the starting temperature: Press the button once to display the starting temperature. Press the button for about 3 seconds for a long time. The number of starting temperature will flicker. The required temperature can be set by the button up and down.
2. Setting the stop temperature: Press the key once to display the stop temperature. Press the key for about 3 seconds for a long time. The stop temperature number will flicker. The required temperature can be set by the up and down keys.
Heating mode:
1. Setting essentials: Start-up temperature < stop temperature (the program automatically judges working mode as a heating mode).
2. Settings:
Press the up button for a long time, after flicker, and set the start temperature by the upper and lower keys.
Press the down button for a long time, after flicker, and set the stop temperature by the upper and lower keys.
How to set it up:
1. Determine the working mode as heating mode, starting temperature < stopping temperature.
2. Press the up key button for a long time. When the temperature value flickers, press the upper and lower buttons to adjust the temperature. The starting temperature is 41°C.
3. Press the down key button long. When the temperature value flickers, the upper and lower keys are pressed to adjust the temperature, and the stop temperature is 51°C.
Refrigeration mode:
1. Setting essentials: Start-up temperature > stop temperature (the program automatically judges the working mode as refrigeration mode)
2. Settings:
Press the up button for a long time, after flicker, and set the start temperature by the upper and lower keys.
Press the down button for a long time, after flicker, and set the stop temperature by the upper and lower keys.
Use cases:
Control cabinet radiator, heat dissipation to 24°C stop, temperature rise to 32°C again start radiator.
How to set it up:
1. Determine the working mode as a refrigeration mode. Start temperature > stop temperature.
2. Press the up key button for a long time. When the temperature flickers, press the upper and lower buttons to adjust the temperature. The start-up temperature is 32 °C.
3. Press the down key button long. When the temperature flickers, press the upper and lower keys to adjust the temperature, and the starting temperature is 24 °C.

-
علی فنودی | 10 ماه پیش سلام برای استفاده در دمای بالاتر از 100 درجه میشه به جای ntc 10k از ntc 100k استفاده کرد
-
پشتیبانی | 10 ماه پیش سلام می توانید از ترموستات دیجیتال با سنسور NTC مدل MG-901FE کد کالا 3011020065 استفاده نمایید .
-
-
امین عیاری مارالانی | 1 سال پیش سلام من یه دماسنج میخوا تا ۵۰۰ درجه رو نشون بده
-
پشتیبانی | 1 سال پیش سلام
می توانید از این مدل استفاده کنید
ترموستات دیجیتال با ترموکوپل مدل MG-901FE کد کالا 3011020064
-
-
مهدی پورشعبانی | 1 سال پیش درود و تشکر از فروشگاه خوبتون.من این ماژول رو برای فن ماشینم گرفتم .با فعال شدن رله ماژول در دمای مشخص شده فن دور تند ماشینم بدون خطا الان چند ماه هست که داره کار میکنه.این رو نوشتم تا اونایی که برای این کار میخوان استفاده کنن بدون هیچ مشکلی میتونن استفاده کنن
-
پشتیبانی | 1 سال پیش باتشکر از به اشتراک گذاری تجربیاتتون.
-
-
رمضان هادی پور رکنی | 2 سال پیش سلام. از شرکت شما ترموستات XH-W3001 خریداری کردم. ورودی تغذیه و خروجی ترموستات مشخص نیست یعنی به زبان چینی نوشته شده است. اگه ممکنه راهنمایی بفرمایید. ورودی و خروجی، پایه مثبت و منفی را با رنگ سیم بفرمایید09119266697
-
پشتیبانی | 2 سال پیش سلام
در تصاویر مشخص شده
سیم قرمز و مشکی برای اتصال تغذیه // سیم زرد و مشکی برای اتصال به دستگاه
-
-
Reza Mohammady | 3 سال پیش سلام میشه برای پکیج استفاده کرد-
پشتیبانی | 3 سال پیش سلام ، برای این مورد تست نشده است .
-
-
مانی قربانی | 3 سال پیش برای ساخت یخچال با ترمو الکتریک مناسبه؟ و تنظیم کرذنش رو اگه میشه توضیح بدید نتونستم راه اندازیش رو ببینم-
پشتیبانی | 3 سال پیش سلام ، امکان اتصال و استفاده برای کنترل دمایی خواهد بود
-
-
علیرضا محمدی | 4 سال پیش با سلام .طول سیم سنسور را می توان زیاد کرد .
چون سنسور از نوع NTC 10K میباشد اضافه کردن چند متر سیم
خطای ایجاد نخواهد کرد . مگر 10 متر سیم میخواهد چند اهم باشد
که خطای قابل ملاحضه به وجود اورد .-
پشتیبانی | 4 سال پیش سلام، افزایش طول سیم سنسور بر روی این کالا تست نشده است.
-
-
محمدطه طاهریان | 4 سال پیش سلام وقتی برق قطع بشه و دمای ترموستات روی 37/5 باشد و ترموستات خاموش شود و وقتی برق وصل شود ترموستات به دمای 37/5 بر میگرد یا خیر؟؟؟؟-
پشتیبانی | 4 سال پیش سلام، با رفتنب رق تنظیمات پاک نمی شود
-
-
Hamed shakori | 4 سال پیش ایا امکان افزایش طول سیم سنسور وجود دارد حدودا یک متر یا یکو نیم متر-
پشتیبانی | 4 سال پیش سلام، متاسفانه تست نشده است
-
-
بهزاد حبیب زاده | 4 سال پیش برا ساخت دستگاه جوجه کشی هم میشه استفاده کرد-
پشتیبانی | 4 سال پیش سلام، بله می شود استفاده کرد
-
- 1
- 2
- 3
- بعدی
